Here is one technique in a 5-part series on how to finish seams.
French Seams Step-by-step Tutorial
![](https://paigehandmade.com/wp-content/uploads/2020/03/MVI_4354.00_00_12_04.Still001-2-1024x576.jpg)
![](https://paigehandmade.com/wp-content/uploads/2020/03/MVI_4354.00_00_18_11.Still002-2-1024x576.jpg)
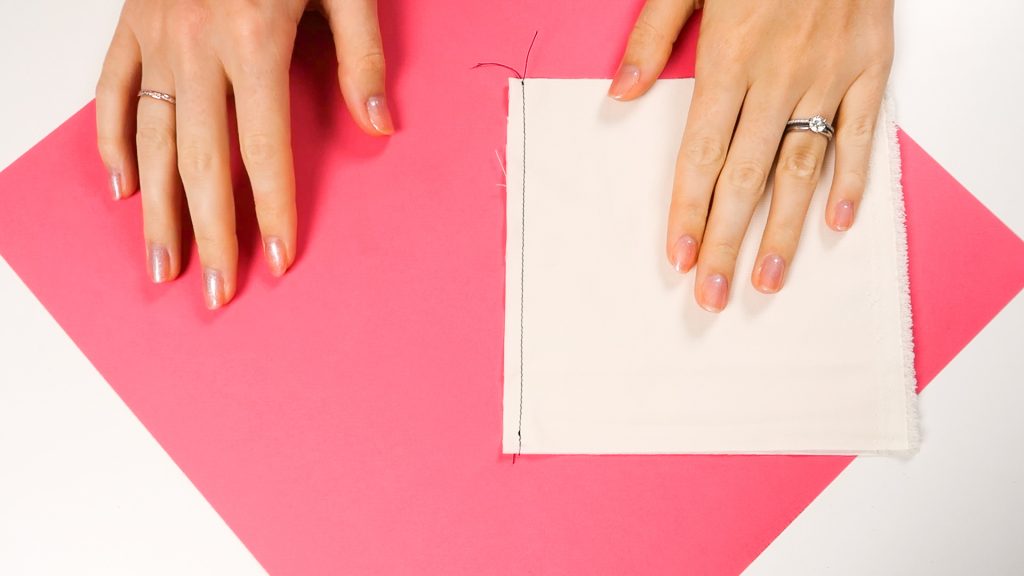
Place fabric with WRONG sides together, RIGHT sides facing out. Stitch 1/4″ seam allowance.
![](https://paigehandmade.com/wp-content/uploads/2020/03/MVI_4354.00_00_22_01.Still003-2-1024x576.jpg)
![](https://paigehandmade.com/wp-content/uploads/2020/03/MVI_4354.00_00_27_00.Still004-2-1024x576.jpg)
Cut 1/8″ (or less) off of the seam allowance to get both fabric edges even and the seam allowance narrower.
![](https://paigehandmade.com/wp-content/uploads/2020/03/MVI_4354.00_00_36_13.Still005-2-1024x576.jpg)
Open the seam and press.
![](https://paigehandmade.com/wp-content/uploads/2020/03/MVI_4354.00_00_41_22.Still006-2-1024x576.jpg)
Turn the fabric to RIGHT sides touching and WRONG sides facing out. The seam allowance is sandwiched in between the layers. Press. Stitch 3/8″ away from the edge for a total of 5/8″ seam allowance (if that is the correct seam allowance for your project).
![](https://paigehandmade.com/wp-content/uploads/2020/03/MVI_4354.00_00_44_05.Still007-2-1024x576.jpg)
Press to one side. Voila!
![](https://paigehandmade.com/wp-content/uploads/2020/03/MVI_4354.00_00_52_07.Still008-2-1024x576.jpg)
![](https://paigehandmade.com/wp-content/uploads/2020/03/MVI_4354.00_00_53_15.Still009-2-1024x576.jpg)
[…] French Seams […]