The free #phPaletteCover sewing tutorial!
Do you save all your fabric scraps? I do! Well, the potentially usable ones. My basic standard for my cotton scraps is a 3×3 inch square. If it is smaller than that it needs to have a cute print or something special. As I was tucking a scrap into my ziplock bag of little scraps I had an idea. “Time for a 3×3″ scrap buster sewing machine cover!” I documented the process for you too!

Finished Measurements
Width: 18″ Depth: 9″ Height: 11.5″
Supplies You’ll Need:
-fabric (amounts will vary/great scrap buster)
–cotton batting (craft size, 34×45 inches)
-2 packs of double-fold bias tape (approx. 3.5 yards needed)
–bias tape piping (approx. 60″ or 2 yards needed)
-thread (I mostly use Gutermann)
–rotary cutter
–cutting mat (this is my purple/blue mat)
–acrylic ruler (mine is 6×12)
–curved safety pins or spray basting
-scissors (my favorites)
-hand-sewing needle (my favorite)
-thimble (my favorite)
“Use what you have & get what you need!” -Mrs. Frugal *me*
Full Video Sewing Tutorial
Written Tutorial

Begin by cutting 84 squares that measure 3×3 inches (approx. 7.5cm). The 3-inch squares are your colorful pieces. Then cut 102 rectangles that measure 3×1 inches (approx. 7.5×2.5cm). These rectangles are your background pieces. They can be any color, but for this look use white or black for highest contrast.
Sew the white rectangles to the left OR right sides of all the squares. If you pick the right side, sew ALL pieces on the right side. This is most important for directional prints (look at the castle image in the picture). When all of the white rectangles have been sewn to the squares you can press the seams. I press my seams open to reduce bulk. You can nest your seams if you prefer.

When you have all of your seams pressed you can begin arranging the squares in the pattern you like. For my cover I tried to scatter by color, brightness, size of the print, etc. This part is all about your creativity!

Once my layout is finalized I begin attaching pairs. I use the chain piecing technique whenever I can so I don’t waste time or thread. To do this in an organized manner you will need to stack your pairs in the order they belong in. After the pairs are sewn together, I press them and put them back into their rows (second row from the bottom in the picture above). Then I attach the double pairs and press (second row from the top). Finally, I add one white rectangle to the other side of the open square edge (top row). The main section of the cover is six squares wide. The side panels are three squares wide.

When the six square rows are all together and pressed, it is time to attach the long white strips that separate the rows. These strips are 1 inch wide and just a bit longer than the rows. I trim them to the exact length after they have been sewn. The main panel of the cover is ten rows tall (6 wide/10 tall). The side panels are 4 rows tall (3 wide/4 tall).

As I pin the rows together I match the seams and pin in each white section.

I press all the seams open. I like the way it makes the fabric lay from the front.

Give the panels a final press. Here is a good time to point out the direction of the squares. If you look at the center where the black UFO and blue dog are you can see that they are oriented in opposite directions. This was on purpose. I want the directional prints to be facing up on both the front and back of the cover. The horizontal center of the panel is the top and I positioned the rows according to that line. I hope that makes sense.

Now the quilting process begins. Choose a backing fabric that is a little larger than your panels. Smooth a layer of cotton batting over the backing. I have a full quilting video series if you need any additional support with quilting.

Lay the panel straight with the grain of the backing fabric. I prefer to pin all the layers together with curved safety pins. If you don’t like using safety pins you can use spray basting. You need to temporarily “lock” those three layers together.

Here is the quilting pattern I decided on. It is very simple and sweet. In this video I walk through exactly how to do straight line quilting.

Cut the excess backing and batting off. The measurements of the panels should be about 10×12″ for the side panel and 19×30″ for the main panel.

With a curved ruler or the edge of a bowl mark a curve at the top of the side panels.

I stitch along that line and then trim off the corners. The stitching should be about 1/8″ away from the edge.
Next, baste piping along the edge of the side panel, but not along the bottom.

Match the seams on the sides of the side panel and front and back of the main panel. Pin with right side together.

Pin the top and curves into place.

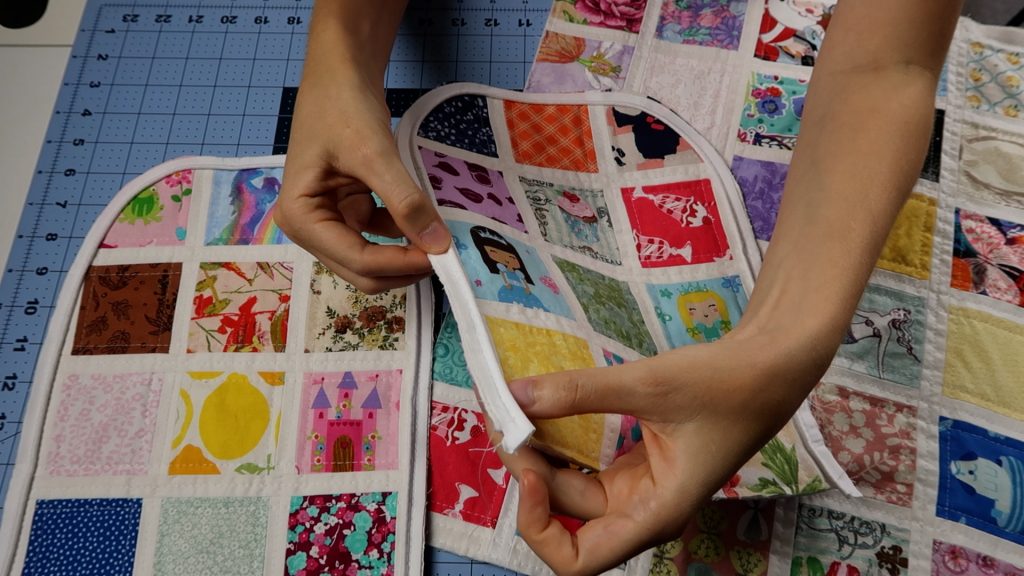
After the seam is sewn you can then attach bias tape to bind the raw edges. I attach it with machine stitches on the first pass and then fold it over, pin, and hand stitch the other side.

If you sew it by hand then you have no visible stitches. Very clean and pretty!

Press the bound seams toward the main panel in preparation for binding the bottom edge.

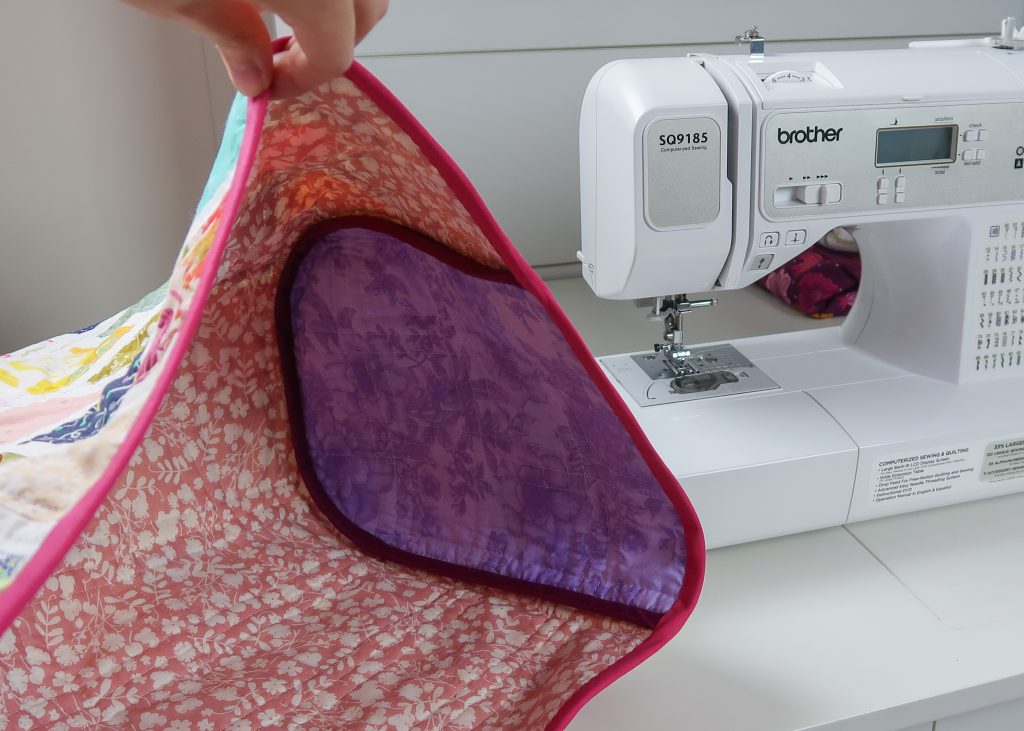
Attach the double fold bias tape to the bottom edge. Cut off any excess piping, like what you see in the photo above. Fold it over the raw edge and hand stitch the folded side.


The cover is now completely sewn, but there is one more step that I love… Put it in the washer and dryer, then it will get that perfect crinkle of a washed quilt.

Go get creative and make something you love!
-Paige
Just curious how big your sewing machine is. I am not sure how much bigger I need to make my cover.
Perfect! Thank you..