
I’ve been using the same Christmas tree skirt for about 10 years. It is red, green and white with a snowman front and center. He is classic and cute, but it was time for an upgrade. In true Paige-the-Elf fashion, I decided to make the new one.
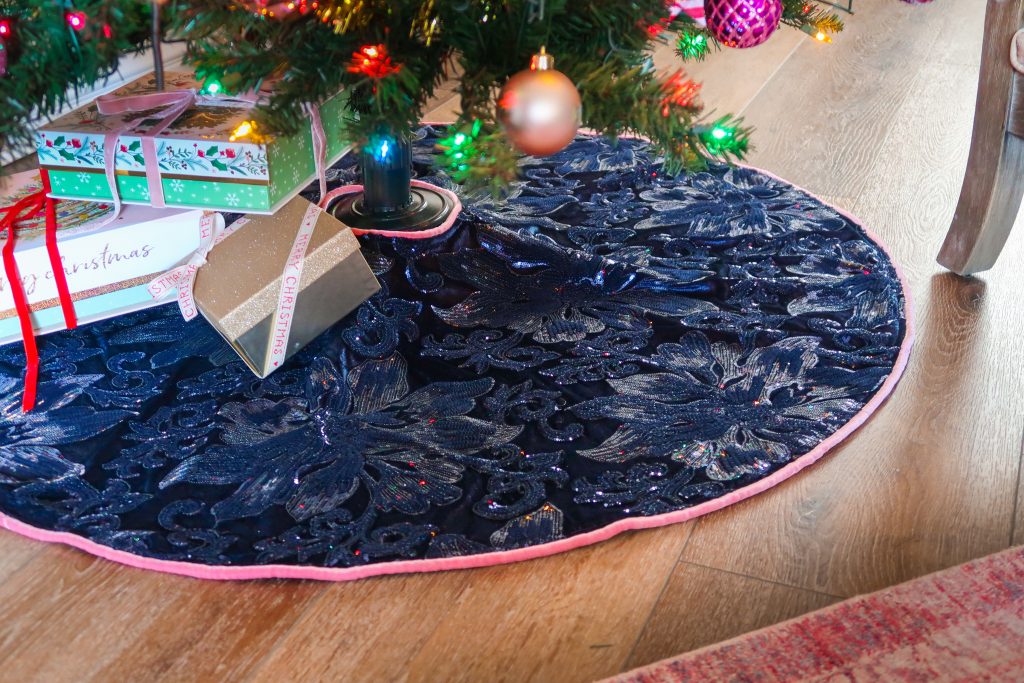
With embroidery and velvet on my mind, I went on my search. First stop was Mood L.A. and then my local JOANN store. I found a beautiful sequin embroidered stretch velvet in navy. It cost $25 for 1.25 yards on sale. In the back of my mind I knew I had some rose-colored stretch velvet at home to use for an accent and navy satin ribbon. I bought an inexpensive knit fabric in navy for the bottom of the tree skirt too ($5 for 1.25 yards).
I wanted to get my tree skirt made as soon as possible, but I couldn’t leave you without a tutorial! So I planned, prepped, and got to work. Now I have this glamorous, sparkly tree skirt and you have this tutorial. I hope you like it and make something you love!
Calculations
Use my full circle skirt worksheet to determine how much fabric to buy or copy me. I bought 1.25 yards of my two main fabrics, but you know how you end up with a little bit extra fabric… I had about 48 inches of length on a 58 inch wide bolt of fabric. I cut out a 23 inch radius or 46 inch diameter. After sewing it using 5/8 or 3/4 inch seam allowance the final skirt was about 44 inches across.
When buying the fabric go with your end goal in mind. How wide do you want it to be? Add seam allowances. Check the bolt width of the fabric. Tell the fabric cutter specifically how many inches you need. Add a few inches just in case.
Supplies
The Main Fabric: Fancy fabric you love!
The Underside Fabric: Use something plain if you don’t plan on flipping it over. On the other hand, you can pick something fun if you want it to be reversible.
Bias Fabric: I used a large scrap (roughly 1/2 yard) of this stretch velvet to make my bias strips. You will need enough bias strips to go around the inner and outer circle. My tree skirt used about 4.5 yards of bias strips.
Piping Cord: 3/16″ cotton filler cord (same amount as bias)
Pretty Ribbon: 1/4″ satin ribbon (10 inch pieces x6)
Tools
A large piece of paper: Wrapping paper works great!
Paper Scissors: The scissors that are allowed to cut non-fabric things.
Fabric Scissors: Gingher 8-inch scissors. These only cut fabric.
Small Scissors: Happy pink Kai scissors that I use for threads and little snips.
Narrow Zipper Foot: I use this foot to get close to piping.
Pink Tape Measure: It’s pink and it measures, what’s not to love!?
Similar Sewing Machine: My trusty Brother has served me well.
Pins: How can you sew without pins? Pins = Wins.
All my sewing tool recommendations on Amazon. (*affiliate)
Video Tutorial
Quick Summary of Directions from the Video
- Draw and cut out a quarter circle paper pattern piece. (1:12 of the video)
- Mark the center circle opening (where the tree goes). I used a 2.5″ radius. (1:36)
- Fold the underside fabric in quarters. (1:48)
- Cut out the quarter circle from the folded fabric. Align the straight edges of the paper with the folded edges. (2:02)
- Cut out the inner circle from the paper and then the fabric. (2:07)
- When that is opened you have a very large doughnut shape! (2:19)
- Lay out your fancy fabric. Lay the full fabric circle you just made on the fabric and use it as a template to cut out the fancy fabric. (2:29)
- Place the paper pattern on the circle where you want to cut the opening. Use the straight edge as a guide to cut the opening. (3:02)
- Prepare your bias strip. Cut out 2 inch wide bias strips. Place the ends perpendicular to each other with right sides together. Sew diagonally to attach them (see video). Trim the excess fabric from the seams. Press seams open. Make one long strip that will go around the entire tree skirt. (3:13)
- Switch your presser foot to a narrow zipper foot or a piping foot. (4:48)
- Place the filler cord in the bias strip and baste in the seam allowance to create your piping. (5:04)
- Pin the completed piping to the edge of the skirt and the inner circle of the skirt. Baste piping in place. (5:36)
- Lay the underside fabric on top of the main fabric (right sides together). The two circles will sandwich the piping in between them. Pin the circumference of the circle, the sides of the opening and the center circle.(6:31)
- Trim the filler cord from the edges of the piping. You are removing the cord from the seam allowance so you don’t have to sew over the cord. (6:58)
- Tuck the ribbons in between the two main fabrics. Pin the ends even with the edge of the fabric. The long tails will be inside. Each side of the skirts opening will have three ribbons; one by the piping of the inner circle, one in the middle of the opening, and one by the piping of the outer circle. (7:40)
- Sew around the perimeter leaving a 6-8 inch opening between two of the ribbons. This opening is where you will turn everything right side out. (8:35)
- Once you have stitched the perimeter you need to trim the excess fabric in the corners and clip the curves. (9:35)
- Pull the tree skirt right side out through the small opening. (10:00)
- At this point you can press the skirt seams smooth and flat. Next, top stitch around the entire perimeter. This will close the opening and hold the seams flat permanently. The top stitching is optional, but I really like the way it anchors the seams. It is nearly invisible in my sequin and velvet fabric. (10:31)
- The tree skirt is finished!
Tips
- Cut and sew slowly when working with sequins. I had a few areas with very dense sequins. I had to sew very slowly over them. Even though I was being careful I still broke two needles on the final top stitching round (two layers of sequins). It happens…
- Clip the seam allowances on curves to help everything lay flat and smooth. Clip the extra fabric from the corners to reduce bulk from corners.
- Use a flame to melt the ends of the ribbons. That will stop any fraying of the ribbon ends.
- Use a narrow zipper foot to sew close to the piping. It makes everything look crisp and neat.
- You can substitute many different trims in place of the piping. Here are a few ideas: pom poms, ostrich feathers, faux fur, tassel fringe, yarn, etc.
If you make a tree skirt with this tutorial and would like to share a photo with me tag me on Instagram @paigehandmade. I would love to see your creations. Go get creative and make a tree skirt you love!

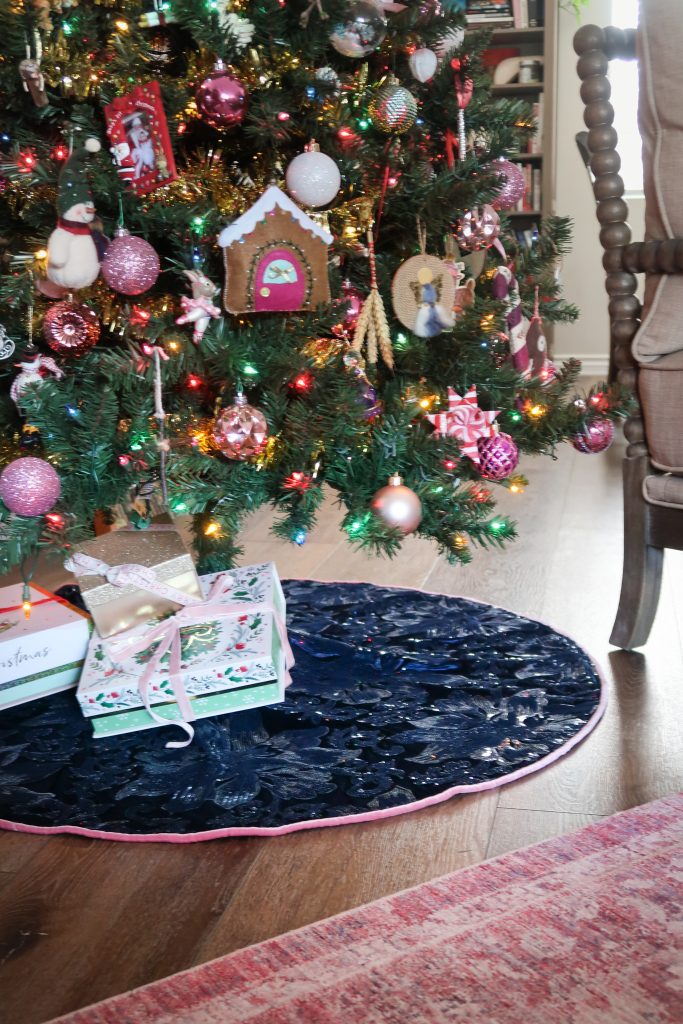
I love the sparkle of the sequins! This is so pretty!