
The Cloth Napkin & It’s Perfect Corners
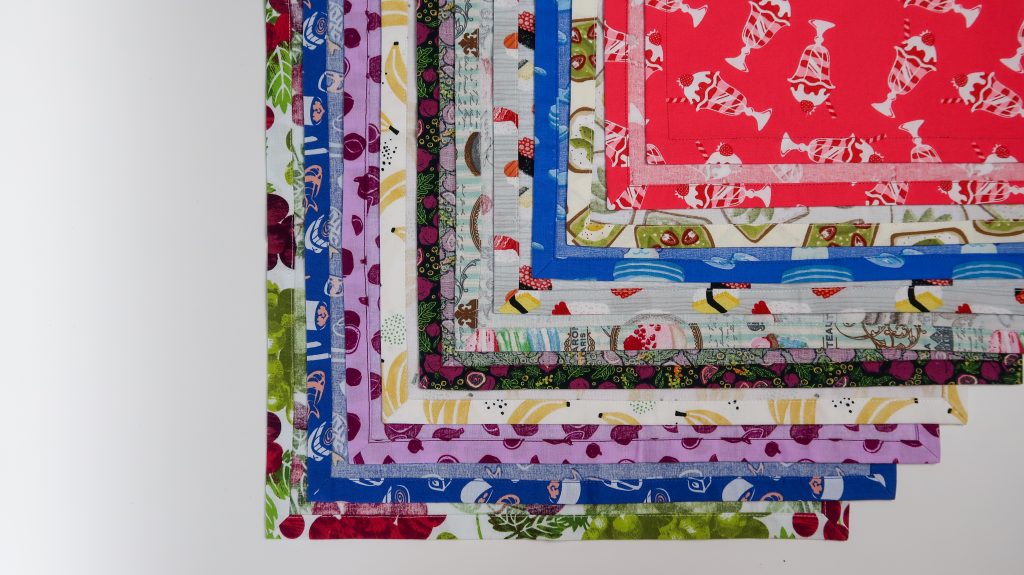
I needed a batch of cloth napkins for our everyday meals at the table. Napkins that weren’t “precious”; something you could use when you eat spaghetti. As I was looking at quilting cotton fat quarters, the idea struck me. I grabbed ten fabrics with some type of food item on them; grapes, sushi, pomegranates, bananas, sweets, pancakes, avocado toast, and sundaes. My kids had fun picking their favorites too.
You know me, I couldn’t keep a good sewing technique to myself. I documented the process for you too. We all could use or gift a set of cloth napkins, right?
The perfect mitered corner… it is easier than you think! I’ll show you the easiest way to get a crisp corner every time.
Video Tutorial
Find all the tools I used in this tutorial HERE.
Napkin Sizes & Cut Size
Cocktail (6×6″ with 1/2″ hem): cut 8×8″
Tea (12×12″ with 1/2″ hem): cut 14×14″
Lunch (14×14″ with 1/2″ hem): cut 16×16″
Dinner (20×20″ with 1/2″ hem): cut 22×22″
Formal (22×22″ with 1″ hem): cut 25×25″ (1/2″ turned once and 1″ turned again, like the yellow example below)
Video Screenshots (pausing at the right spot)

- Cut a perfect square. 16 inches for this example. Iron in 1/2″ on all sides.

2. Fold on the diagonal and match the folded edges exactly. Place you ruler along the diagonal fold.

3. Mark a line perpendicular to the diagonal fold where the raw edge of the hem meets the diagonal fold (OR at the 1 inch line as in the yellow example below *scroll down*)
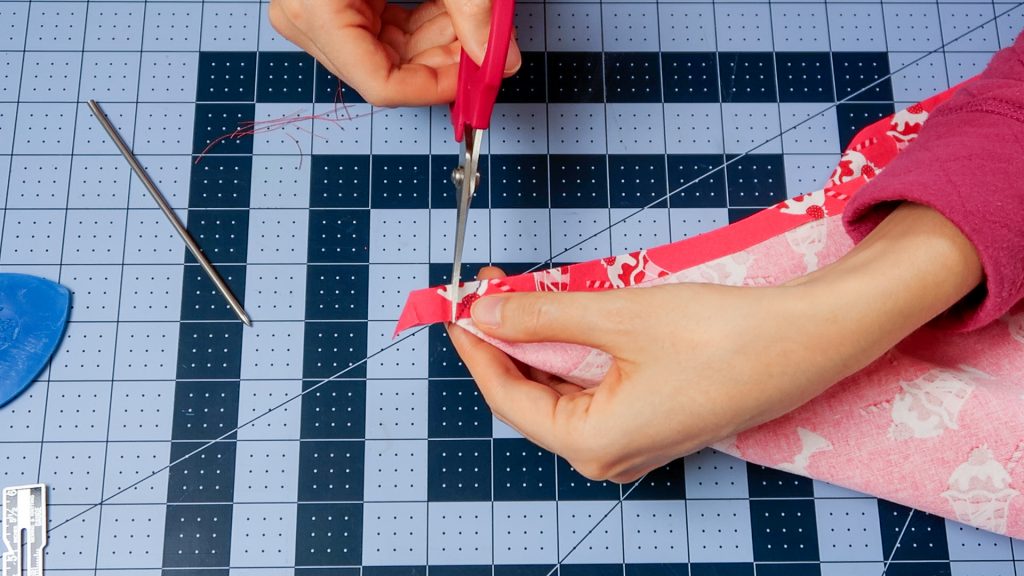
4. Stitch the line you marked on all corners. Back stitch at the beginning and end of the stitching line. Clip off the excess fabric on a angle being careful to not cut too close to the corner. It should look like a little wedge.

5. Press open the seam with your fingers. This balances the seam allowance in the corner.
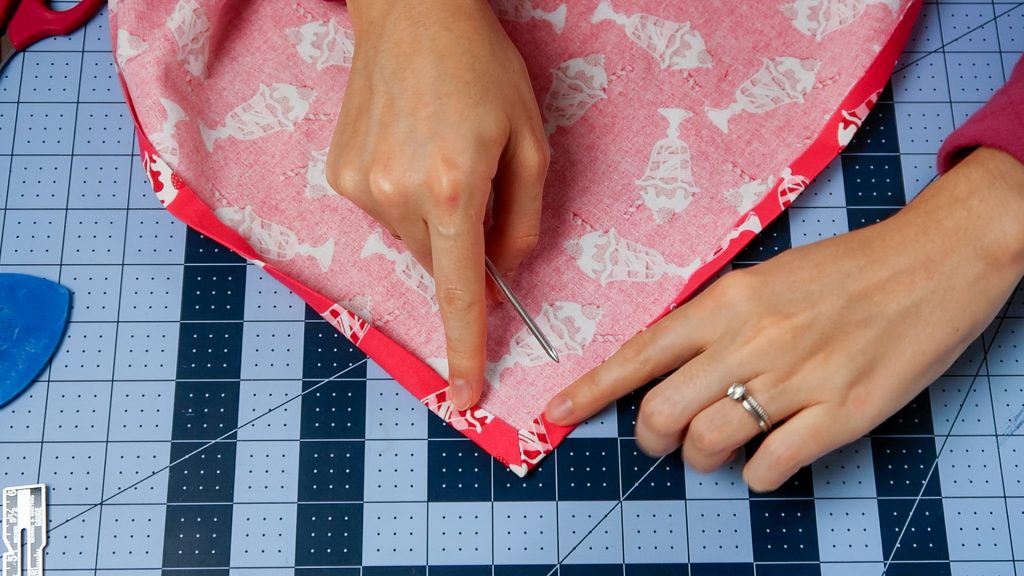
6. Turn and pop the corner out with something pointy but not sharp. This silver pointer isn’t specifically a sewing tool… something similar would be *this point turner.

7. Press the corners and edges.

8. Stitch close to the inside edge of the hem. Start in the middle of one of the sides.
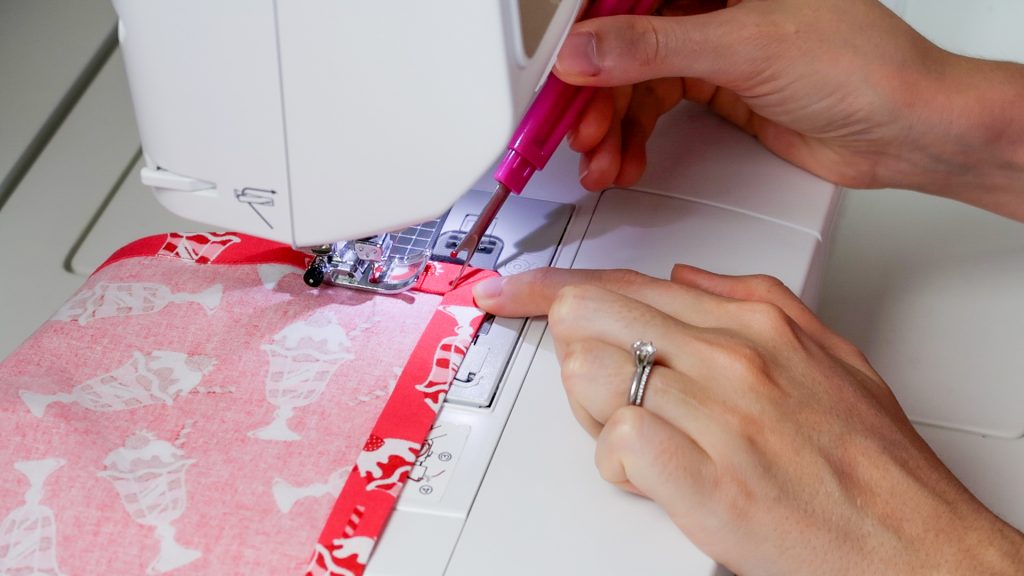
9. Slowly stitch into the corner and stop right at the corner seam. Be very precise here. With the needle down, lift the pressure foot and turn the napkin. Lower the pressure foot and continue sewing until you get to the next corner. Sew until you reach your starting point, overlap 4-5 stitches and back stitch 3-4 stitches. Pull all the thread ends to the back side and trim.

Voila! Look at that pretty mitered corner. In this photo you can see where the seam allowance of the corners are. It looks balanced and smooth.
The Yellow Example (1″ hem)
The technique is exactly the same, but where you stitch changes. I marked a pink line to show where the 1″ fold would be. The point at which that pink line meets the diagonal fold is where your stitch line will be. You can adjust this to any point. Mark the hem you desire and find where it meets the diagonal fold. You will cut the excess exactly the same as the narrower example.

Go get creative and make a napkin you love!
-Paige

Paige – you are a lifesaver! I have watched many videos on mitered corners and your instructions by far are the simplest to follow. Thank you so much for taking the time to post a video and written instructions on how to do this.
You are welcome! I am glad I could help.
After looking at a few other videos that made making napkins with mitered corners sooo complicated, I came across your video. Thanks so much for simplifying the process. L
I have tried following the video and the written instructions and it seems so simple, but I just can’t seem to get the corners to lie flat! They need to fold over themselves to get straight edges around the rest of the napkin and I just can’t work out what I am doing wrong. I have tried 6 times now and followed step by step pausing the video at every step, but I still can’t work out why my corners still need to fold over themselves (with bulk) to get them flat so the sides lay flat. Any ideas?
I am having the same problem as well. Is there a step left out about a specific measurement we should be checking to have it lay flat? Any advice is much appreciated! Thank you!
I’m sorry you are having a hard time with the corners. I showed the method as thoroughly as I could, and many people are getting the expected results. My advice would be to do two things: first, make sure your stitch line is at the correct angle in relation to the folded edges, second, make sure you are clipping away enough of the seam in order to tuck in the corner without bulk. It is difficult to know exactly what the tricky bit is without seeing it, but my guess is the angle of the stitch line. I have sewn the wrong angle and the corner seam stands up instead of lying flat. I hope this helps.
Paige, I struggled but understood my problem. It was trying to get the prospective from opposite side of you so after watching the video twice , third time I turned my i pad so my view was like standing where you stood rather then opposite . I then could understand which way to fold and mark stitching line. I was able to then make 4 beautiful mitered corners on them. Thank You.
This method was easy and beautiful with 1/2 inch hem. However, I tried it with a 1/4 inch hem and it didn’t turn out. Any tips for a smaller hem?